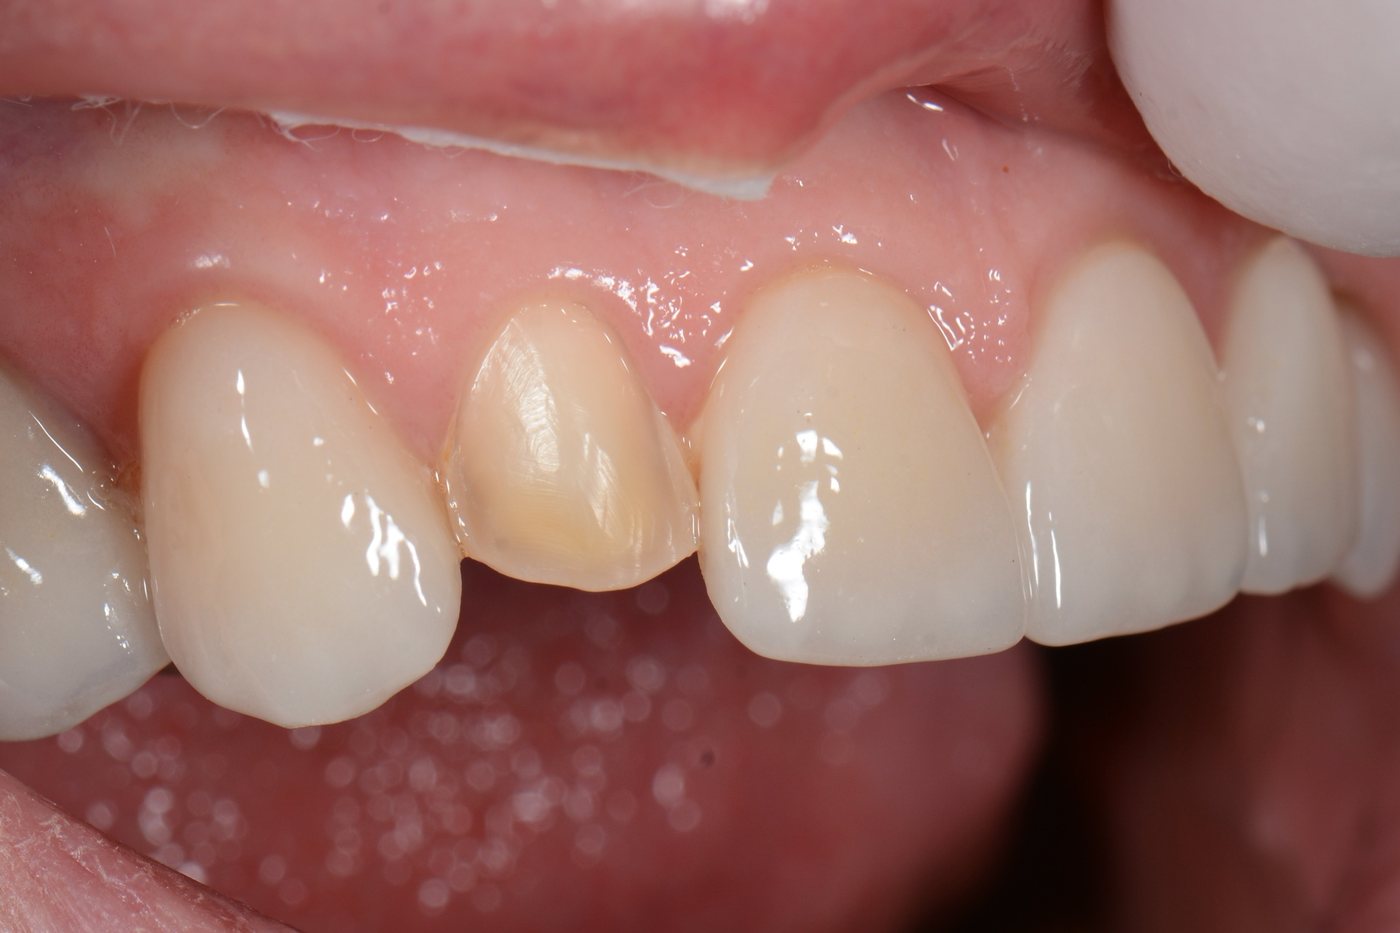
- The chipped veneer on the upper right lateral incisor (tooth 1.2) was replaced with a new milled ceramic veneer.
- The stages: finishing the preparation, scanning, choosing the shade, making the veneer in the laboratory and adhesive bonding.
- The greatest challenge was matching the shade to the neighbouring teeth.
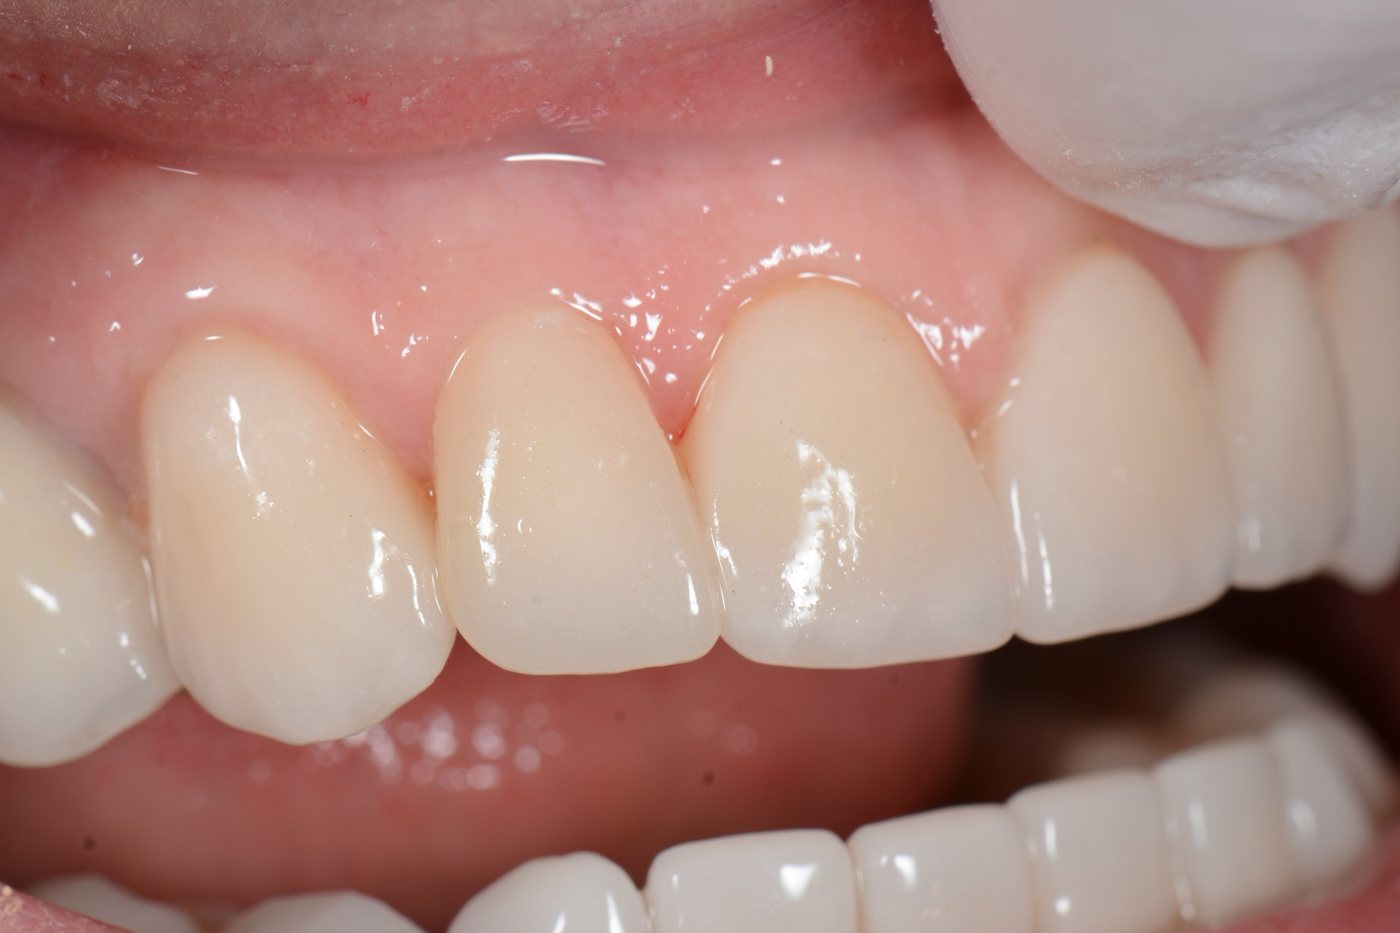
- The result: a veneer that blends in naturally with the surrounding teeth.
The case: a chipped veneer on a lateral incisor
The patient had a ceramic veneer on her upper right lateral incisor, tooth 1.2. The veneer had chipped and needed replacing.
Her aesthetic expectations were high. The new veneer had to match the colour and appearance of the neighbouring teeth, so that no one could tell it had been replaced.
Tooth preparation and scanning
I finished the preparation of the tooth for the new veneer. Veneers need only a very thin layer of enamel to be removed, so as much of the natural tooth as possible is preserved.
I then scanned the tooth. The digital impression goes straight to the laboratory, where the veneer is designed on the computer. You can read more about this step in the article on intraoral scanning.
Choosing the shade: the hardest part
When a single veneer is replaced between teeth that stay as they are, the colour decides the result. Even a slight difference in shade is noticed straight away, especially on the front teeth.
A veneer is very thin, and ceramic is partly translucent, like natural enamel. The shade we see in the mouth does not come from the ceramic alone, but from three layers on top of one another:
- the colour of the prepared tooth, which shows through the veneer;
- the resin cement, which has its own shade and a certain translucency;
- the ceramic of the veneer.
The challenge was finding the exact ceramic shade that, together with the resin cement and the colour of the prepared tooth, would give the same colour as the neighbouring teeth. The prepared tooth was darker than the teeth around it, and the veneer had to make up for this difference without looking opaque.
The milled ceramic veneer
Based on the scan and the chosen shade, the veneer was made in the laboratory from milled ceramic. The veneer is designed on the computer and then milled from a block of ceramic. Its shape follows the digital design precisely, and the material has a uniform structure.
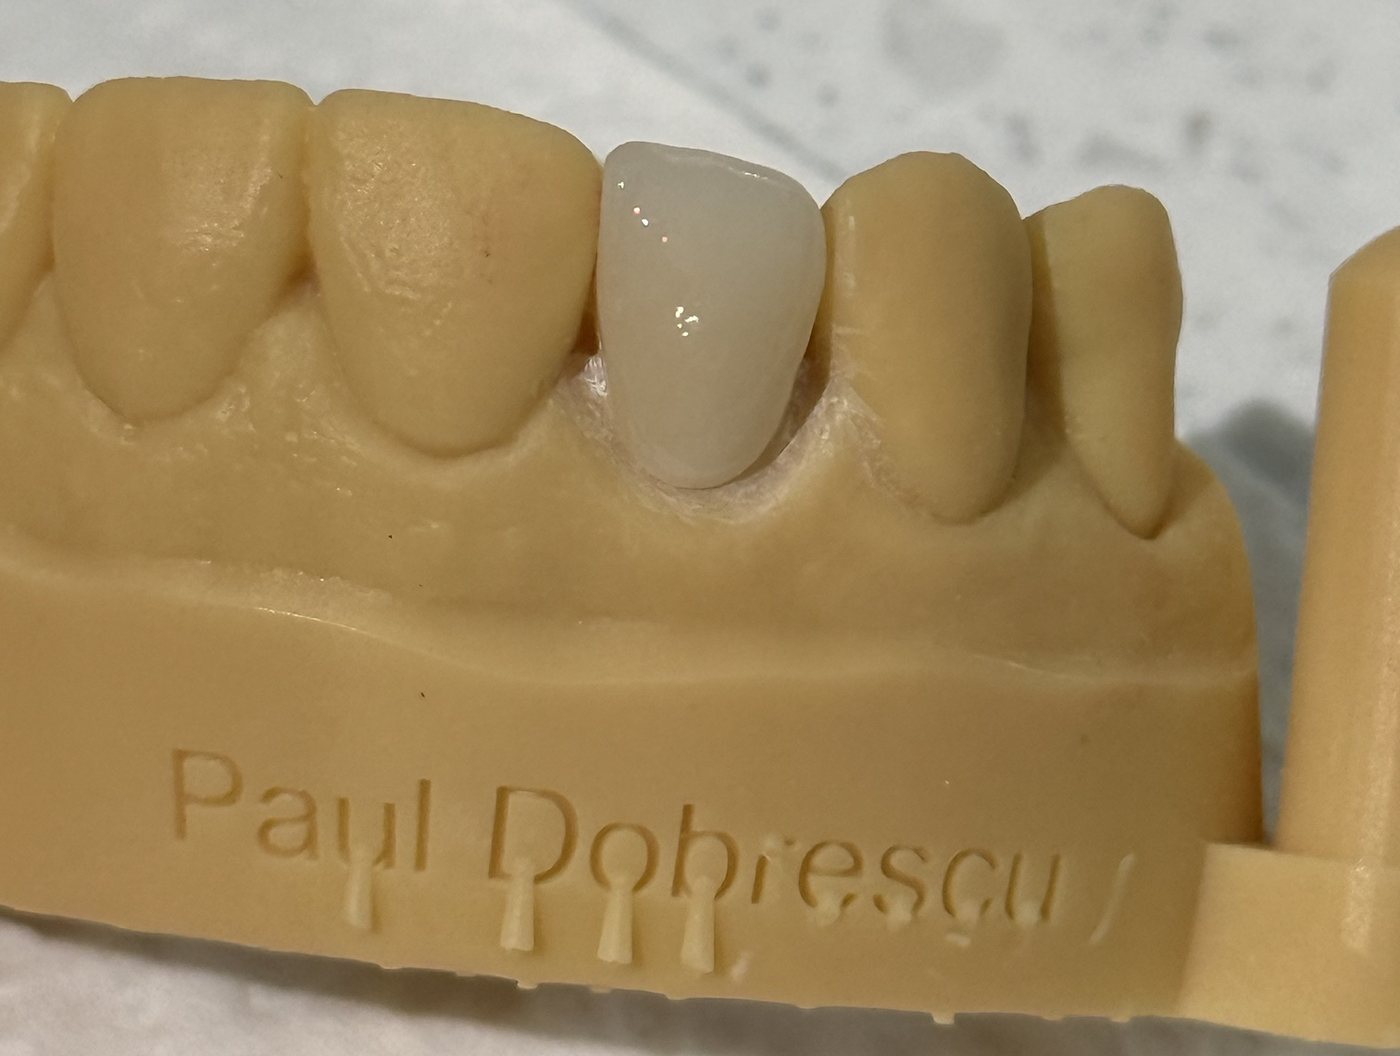
I have written about feldspathic porcelain veneers, built up layer by layer by the ceramist, in a separate article.
Adhesive bonding
The veneer was bonded to the tooth adhesively. The tooth surface and the ceramic are each prepared with specific products, and the resin cement joins them into a single structure.
The adhesive bond is what gives such a thin piece its strength. The shade of the resin also matters at this step, because it is part of the final colour.
The result
The result was a good one. The new veneer matches the colour of the neighbouring teeth and blends naturally into the smile, which mattered most to the patient.
How long it lasts and how to care for it
A well-made veneer that is properly cared for lasts many years, often more than 10. The daily routine is simple:
- a medium-bristle toothbrush rather than a soft one: it does not harm the gum but cleans restorations effectively;
- dental floss;
- a water flosser after brushing;
- professional cleaning in the clinic every 3–6 months, as advised by your dentist.
You will find more advice in the article on caring for dental restorations, and more about the treatment on the porcelain veneers page.
Frequently asked questions
Can a single veneer be replaced?
Yes. The chipped veneer is replaced and the other restorations stay as they are. The difficult part is matching the colour to the neighbouring teeth.
Why is the shade hard to match?
Because a veneer is thin and translucent. The final colour comes from the ceramic, the resin cement and the colour of the prepared tooth, taken together.
Does the tooth need much preparation?
No. Veneers need only a very thin layer of enamel to be removed.
How long does a ceramic veneer last?
When well made and properly cared for, a veneer lasts many years, often more than 10. A professional clean every 3–6 months helps it last.
This article presents a treated case and provides general information. It does not replace a consultation and clinical examination; every treatment plan is made individually.

Dentist with over 20 years of practice dedicated to prosthodontics and dental aesthetics. Founder of ARTeeth Dental Clinic, Bucharest.
At your consultation I examine the veneer, the tooth beneath it and the neighbouring teeth, and explain the steps of replacing it.